HP VSR is a Comware 7 router software application for a server which provides the same functionality as a physical router. Installed on either VMware or KVM virtual machine it offers routing, Firewall, IPSec, and MPLS VPN security services.
The tutorial gives you some ideas how to install HP VSR1000 (Virtual Service Router) running Comware 7 OS on Qemu disk and connects Qemu appliance to GNS3.
They are HP VSR1001, VSR1004 and VSR1008 models available for download. Differences between models are explained here. As the VSR1001 model has the lowest RAM requirements comparing to other models and we do not have to concern the forwarding performance, VSR 1001 demo ISO image is our choice. The demo is full featured, performance limited and requiring no license and with no expiration date.
HP VSR1001 Minimum Hardware Requirements
- CPU: 2.0 GHz
- Memory: 1 GB
- Disk space: 8 GB
- Network interfaces: 2 virtual NICs, E1000 and VirtIO virtual NICs are recommended, maximum 16 NICs supported
1. Download HP VSR1001 Virtual Services Router
Navigate to the Download page here
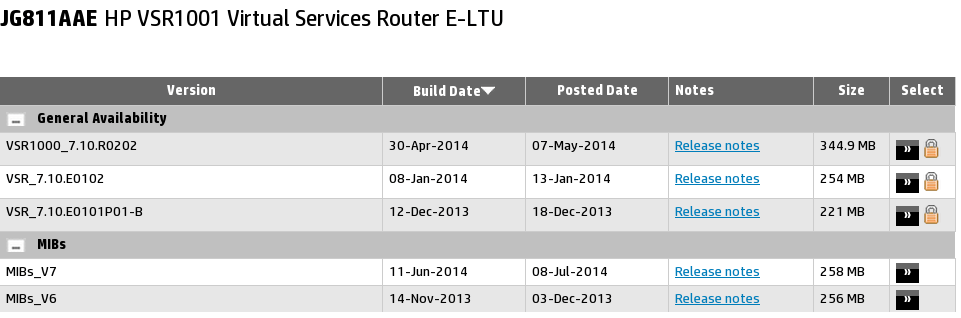
Picture 1 - HP VSR1001 Virtual Services Router Download Page
Click on the button >> on he right, beside the padlock icon. Either sign in with your HP Passport account or create a new account. After registration navigate back to the Download software page. Once you are signed in, you are allowed to download the HP VSR1001 archive file. Click Download button and accept License Agreement.
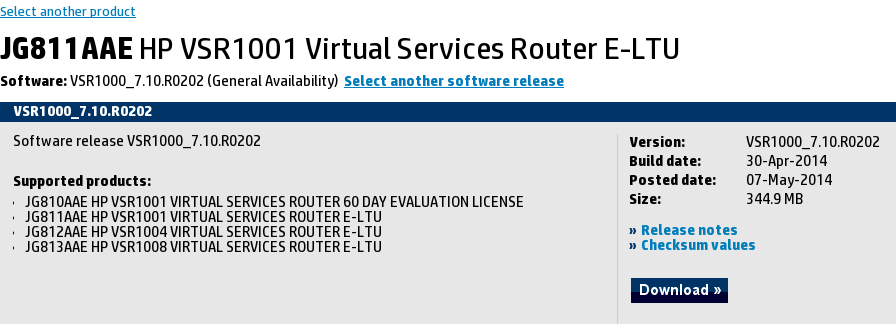
Picture 2 - Unlocked Download HP VSR1001 Virtual Services Router
2. Install HP VSR 1001 on Qemu Disk
2.1. Unzip Archive
$ unzip -e VSR1000_7.10.R0202.zip
2.2. Create Qemu Disk
$ /usr/local/bin/qemu-img create -f qcow2 vsr1000-hp.img 8G
2.3. Start Qemu Disk with Attached ISO image
$ /usr/local/bin/qemu-system-x86_64 -enable-kvm vsr1000-hp.img -cdrom VSR1000_HP-CMW710-R0202-X64.iso -m 2G
Press button 1 - Fresh Install. Type yes to continue VSR1000 installation. Once installation process finishes, type yes to reboot and close Qemu window.

Picture 3 - HP VSR Install Menu
3. Configure GNS3
Start GNS3 0.8.7 and create a new project.
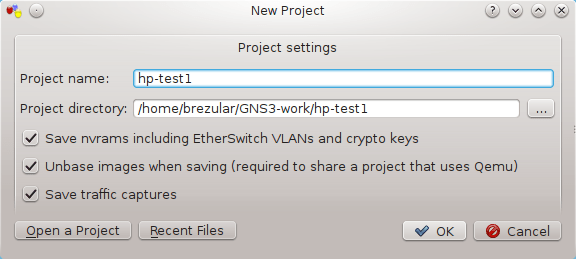
Picture 4 - New GNS3 Project
Navigate to Edit -> Preferences -> Qemu -> General Settings. Configure path to Qemu binaries and qemuwrapper. Once you finished, click the Test Settings button.
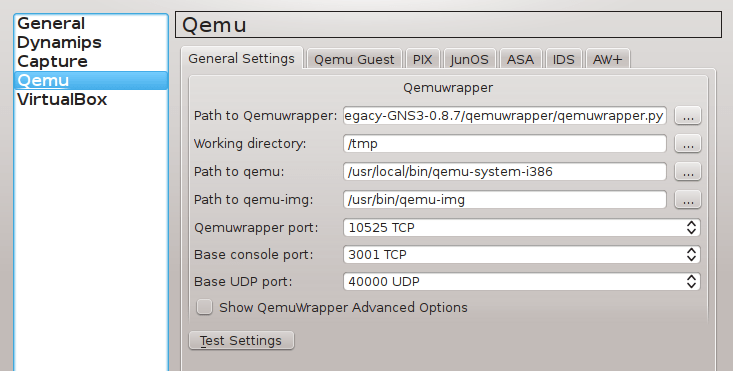
Picture 5 - Qemu General Settings
Navigate to Edit -> Preferences -> Qemu -> Qemu Guest and configure HP VSR 1001 virtual machine settings according to the picture below.
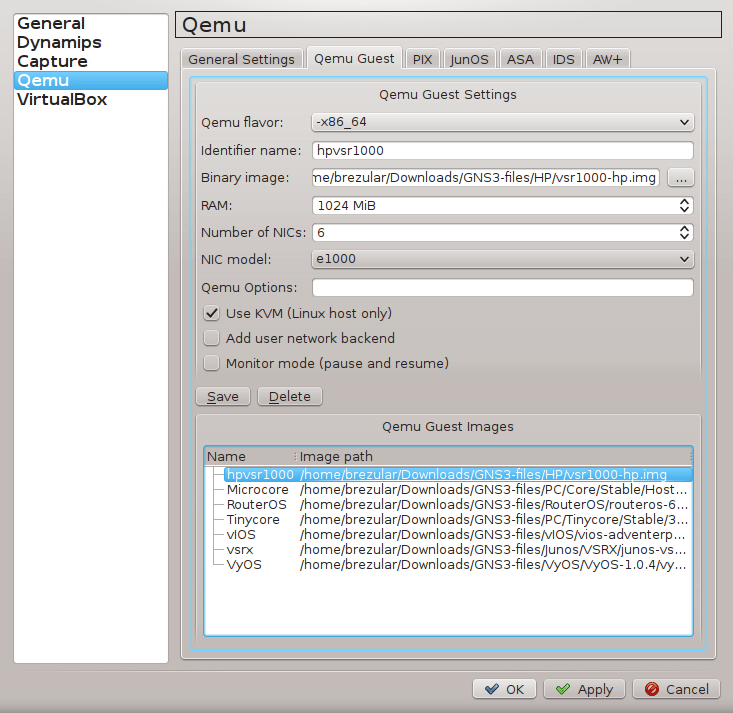
Picture 6 - Qemu Guest Settings
Drag and drop Qemu device to GNS3 dektop. Power on the Qemu appliance. Press Ctrl-D to break automatic configuration.
4. Configure HP VSR Routers and Test Connectivity Between Routers
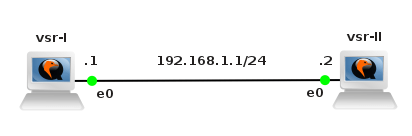
Picture 7 - GNS3 Topology
4.1. Configure HP VSR routers
To be able to log in using GNS3 console we have to configure following commands on both routers.
<HP>system-view
[HP]user-interface aux 0
[HP-line-aux0]authentication-mode none
[HP-line-aux0]user-role network-admin
[HP-line-aux0]quit
Now we are allowed to log in to VSR appliance aux port. Right click on the router icon and select option Console. Configure the hostname and assign IP address for the interface GigabitEthernet 1/0.
VSR-I
[HP]sysname vsr-I
[vsr-I]interface GigabitEthernet 1/0
[vsr-I-GigabitEthernet1/0]ip address 192.168.1.1 24
[vsr-I-GigabitEthernet1/0]quit
[vsr-I]save
VSR-II
[HP]sysname vsr-II
[vsr-II]interface GigabitEthernet 1/0
[vsr-II-GigabitEthernet1/0]ip address 192.168.1.2 24
[vsr-II-GigabitEthernet1/0]quit
[vsr-II]save
4.2. Test Connectivity between Routers
To test connectivity between routers, ping IP address 192.168.1.2 from VSR-I router.
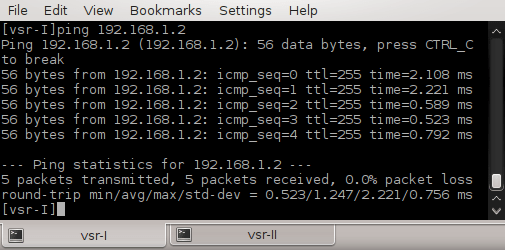
Picture 8 - Successful Ping